- Seven phases, in order. Everything below is one line per step — the explanations live in the linked guides.
- Phases 1 and 2 run in parallel. Treating setup as sequential adds three weeks for no benefit.
- The order is the value. Buying a machine before Phase 4 is the single most expensive beginner mistake.
- Realistic total: 6–10 weeks and $2,000–$2,700 all-in for a single placed machine.
This is the whole thing on one page, in operating order, with nothing explained. That is deliberate. Every line below has a reason behind it, and every reason is somewhere else — mostly in the step-by-step guide to starting a vending machine business, which is where you should go when a line raises a question. What this page is for is the sequence, because the order is where beginners actually lose money. Print it, work down it, and stop wondering what you forgot.
- Phase 1 — Decide what you are building (1 evening)
- Phase 2 — Legal setup (weeks 0–2, runs in parallel with Phase 3)
- Phase 3 — Build the Top-20 list (1 weekend)
- Phase 4 — Outreach until somebody says yes (weeks 2–6)
- Phase 5 — Paper the deal and buy the machine (1–2 weeks)
- Phase 6 — Install day
- Phase 7 — The first 90 days
- The four ordering rules underneath the whole list
Phase 1 — Decide what you are building (1 evening)
- Pick the target: side hustle ($500–$3,000/mo, 1–5 machines), transition ($3,000–$10,000/mo, 5–15), or full-time ($10,000+/mo, 15+).
- Write down the monthly number you actually want. Three excellent placements and twenty-five machines are different businesses.
- Set your radius: somewhere you would genuinely drive every ten days for three years. Three to eight miles for most people.
- Decide your all-in budget and hold back 15% of it for the first repair. Not the cabinet. The repair.
- Confirm the shape fits your life before spending anything — the two-minute readiness quiz is the honest version of this step.
Phase 2 — Legal setup (weeks 0–2, runs in parallel with Phase 3)
- Check name availability on your Secretary of State business entity search.
- File the LLC directly with the state. $50–$300 depending on state. No formation service needed for a single member.
- Get an EIN free at irs.gov/ein. Five minutes. Never pay a third party.
- Open a dedicated business checking account. Commingled funds are how liability protection is actually lost.
- Buy general liability insurance, $1M per occurrence / $2M aggregate. $400–$1,200/year. Do this before pitching, not after somebody asks.
- Request a blank certificate of insurance template so you can produce one on request the same day.
- Apply for the city or county business license. $25–$100/year.
- Register for a state sales tax permit. Free in most states.
- Food or beverage permit from the county health department — only if vending perishables.
- Create a free Google Business Profile so you are lookupable when a manager checks you out after a walk-in.
- Get a business phone number for your one-pager and machine stickers instead of your personal cell. A free Google Voice number works to start; Quo is a paid option once a helper shares the line (referral link, VendBuddy may earn a commission). Setup and text templates: business phone setup for vending operators.
- Full detail with per-step costs and the state-by-state lookups: the pre-machine setup checklist.
Picture the machines paying you while you sleep
That’s the real promise of vending — income that doesn’t cost you your time, and a life on your own terms. VendBuddy turns this guide into a step-by-step plan so you actually build it instead of just reading about it. Start free today.
Start building free →Phase 3 — Build the Top-20 list (1 weekend)
- Draw the radius on a map. Everything outside it belongs to somebody else.
- Fill it from the desk: satellite view, street view, and a business database filtered by employee count. Your library card usually gets you one free.
- Target categories in rough order: warehouses and plants, medical, multifamily 200+ units, genuinely in-office corporate, gyms, schools. Aim for 50–60 candidates.
- Cut on desk criteria: under 50 daily buyers gone, visible cafeteria gone, decision made out of state to the bottom, outside the radius gone.
- Score what survives 1–5 on six factors: captive buyers × hours on site, access hours, absence of nearby food, whether the signer has a reason to care, whether a clean low-friction spot exists, and the three-year restock test.
- Rank them. 25+ sign the day they say yes; 18–24 pursue and fix one weak factor; under 12 does not go on the list at all.
- Run a ten-minute drive-by on the top ten: is there already a machine and in what condition, is there a spot with an outlet, does it feel busy, and can you tell who you would ask.
- Skip the assembly entirely if you prefer — the Lead Finder scores businesses in your ZIP by headcount and captivity and gives you the best contact on file.
- Book half an hour a month to keep the list alive. Lists decay; that habit is why some operators never run out of doors.
Phase 4 — Outreach until somebody says yes (weeks 2–6)
- Target 15 doors a week. Roughly three and a half hours including the drive.
- Go mid-morning on a weekday, 9:00 to 10:30, if your schedule allows it. It is the highest-yield window in the business.
- If it does not: 7:00–8:15 a.m. at plants, machine shops and warehouses, and 4:45–6:00 p.m. at gyms, storage and dealership service departments.
- Ask for the person who handles amenities or facilities. Do not pitch the front desk.
- Lead with the building, not with yourself: what you noticed about their traffic, and what you would put where.
- Leave a one-page leave-behind and a card at every door, including the nos.
- Log every door: building, date, who you spoke to, what they said, next touch due.
- Run a six-touch follow-up cadence over 60 days. Most operators quit after one or two, which is why follow-up is the cheapest edge available.
- Expect 15–20 real conversations per placement. Nineteen nos and a yes is a normal first location.
- The arithmetic behind all of this: the 100-door math.
Phase 5 — Paper the deal and buy the machine (1–2 weeks)
- Send the placement agreement the same day they say yes. Term, commission, access hours, exclusivity, removal, and who pays for what.
- Send a second, separate message with a date, a note that your COI is coming, and a request for a ten-minute visit this week.
- Do the walkthrough: measure the front door, every hallway turn and the elevator. Machines run 33–41 inches; standard doors are 36.
- Find a 120V outlet within six feet and ask what else is on that circuit. Extension cords are for install day only.
- Photograph the spot from three angles, including one from where a person walks in. That is your record of what was agreed.
- Confirm the spot is still the spot, in the walkthrough, not on delivery day with a dolly in your hand.
- Ask the survey question: if you left a list on the break room table for a week, would people say what they want in it?
- Now buy the machine, sized to that room. Dealer-refurbished combo with a card reader is the right first answer nearly every time.
- Add $700–$1,000 to any sticker price for reader, product, move and insurance. Budget $2,000–$2,700 all-in.
- If buying private-party, run the inspection: vend every column, feed the validator a $1, $5 and $20, confirm MDB, and probe-thermometer anything refrigerated.
- No cash-only machines. A reader is $300–$500 and pays for itself in weeks. Full comparison: what vending machines cost.
- Buy the first fill shallow and wide: 12–16 selections at roughly 60% drinks, each slot loaded to half capacity. $250–$400 total.
- Still deciding how many to buy? That is one machine, three, or a small route.
If Phase 5 ends with a new machine rather than a refurbished one
Phase 5 is where the money leaves. A dealer-refurbished combo is still the right first answer for most people, so treat these as the new-machine option, bought for the Prime freight and the return window. Affiliate links, and we earn a commission when you buy through one.
HAHA Smart Combo US-360View on Amazon →Drinks and snacks in one cabinet. The default first AI machine for a 50–100 person site.
HAHA AI Open-Front US-360View on Amazon →The cheapest way into AI vending, for indoor placements where an open front is not a theft problem.
Phase 6 — Install day
- Get the certificate of insurance filed and acknowledged by the property. Sent is not filed, and the person who confirms it is rarely the person who said yes.
- Confirm the machine is out of demo mode. It dispenses free and fails silently. One five-minute call to the manufacturer.
- Tools: appliance dolly rated well above the machine weight, furniture sliders, level, tape measure, socket set, extension cord, contractor bags, product totes.
- Arrive thirty minutes early and confirm the spot one last time before anything moves.
- Unbox at the dock, inspect for shipping damage and photograph it before signing the delivery receipt.
- Move it with the tilt under about 30 degrees and a second person on any narrow turn.
- Level it properly, both directions. Ten minutes here prevents the jam you will otherwise blame on the machine.
- Plug in and let a refrigerated cabinet pull down to temperature before loading cold product.
- Confirm the card reader is online before loading a single item. Basement and metal-sided signal is not parking-lot signal.
- Load the planogram and set every price as you go. Check each one twice.
- Run one real test transaction with a card and one with cash. Confirm the charge landed and the product came out.
- Label the machine with your name, cell number and a line about refunds.
- Find the manager, hand over the signed agreement and your card, and tell them the machine is live.
- Get one launch email or lobby notice from the manager. Write it for them so it takes ten seconds.
- Step-by-step version: the solo install day checklist.
Phase 7 — The first 90 days
- Return on day 3 or 4. Not to restock — to see what data cannot tell you: sight lines, a trash can moved in front of it, a handwritten note taped to the glass.
- Track four numbers only: sales per day not per visit, which slots sold out, which never moved, and whether the reader reported every transaction.
- Reconcile your first collection against reported card sales. Find any gap now, while there are two weeks of history rather than six months.
- Do not change prices for the first two weeks. A change in week two destroys your ability to read week three.
- Do not rebuild the planogram on ten days of data. Note the dead slots; act later.
- Do not panic about week one. Novelty bump, then a week-two dip. Neither is the real number, which shows up around month four to six.
- Send the manager one short note at the two-week mark even if there is nothing to report. Twenty seconds, and it is why they call you about their other building.
- Do not buy machine number two until machine number one has survived two full service cycles without a surprise.
- At day 90, judge the location honestly against your score. A weak placement is a different asset, not a smaller one — see why a machine is not making money before blaming the machine.
The order is the value. Every line on this list is easy; doing them in the wrong sequence is what costs beginners real money.
The four ordering rules underneath the whole list
If you remember nothing else from this page, remember these, because they are what the sequence above is protecting.
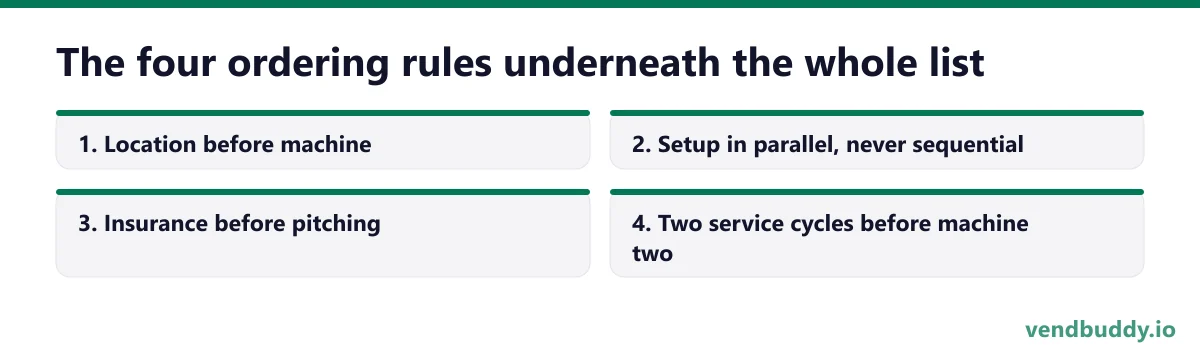
- Location before machine. Always. An unplaced machine applies quiet, constant pressure to accept a building you would otherwise have walked away from.
- Setup in parallel, never sequential. Phase 2 and Phase 3 happen in the same two weeks. Waiting for LLC approval before you start scouting is three free weeks handed away.
- Insurance before pitching. A certificate of insurance requested mid-negotiation is a two-week stall. Having one in your bag turns it into a non-issue.
- Two service cycles before machine two. The urge to scale arrives around week three of owning a working machine, roughly two months before the data that should inform it.
Working the list and want to know how long it should be taking? That is how long it takes to start a vending machine business, week by week.
This page is the list. The bundle is the same sequence in fill-in-the-blank form: the LLC, EIN, permit and insurance checklist in unblocking order, the all-50-states distributor list, the word-for-word walk-in script, and the placement agreement a property manager will sign. $101 of products, bought once.
See what is inside →Frequently Asked Questions
What is on a vending machine business checklist?
Seven phases in order: decide the shape of the business, complete legal setup, build a ranked list of twenty buildings, run outreach until somebody says yes, buy a machine sized to that room, install it properly, and measure the location for ninety days before deciding anything. Most published checklists cover only the legal phase, which is the fastest and least decisive part of the list.
If you want the checklist done for you instead, the starter kit has the checklist and the fill-in templates in one download. It is a one-time $27, not a subscription.
What do I need to start a vending machine business?
An LLC and EIN, a business bank account, general liability insurance at $1M per occurrence, a city business license and state sales tax permit, a secured location, a machine with a card reader, and about $250 to $400 of opening product. Total pre-machine spend is usually $150 to $700, and a realistic single-machine start lands around $2,000 to $2,700 all-in.
What is the first step in starting a vending machine business?
Deciding what you are actually building, because it changes every subsequent decision. A side hustle targeting $500 to $3,000 a month needs three to five excellent placements, not twenty-five machines. If you are replacing a six-figure salary, side-hustle thinking will actively slow you down. Pick the target before you spend a dollar on equipment.
Do I need a license to own a vending machine?
In most jurisdictions yes, though it is usually routine rather than difficult: a city or county business license and a state sales tax permit. A food and beverage permit from the county health department applies only if you vend perishables, and sealed shelf-stable snacks and canned drinks are exempt in many counties. Requirements vary meaningfully by state, so check yours rather than a general article.
What is the most common mistake on a vending startup checklist?
Doing it in the wrong order, specifically buying the machine before securing a location. An unplaced machine applies constant pressure to accept the first building that says yes, and that building is rarely the best one that would have. The second most common mistake is treating legal setup as a phase to finish before starting outreach, which adds three weeks of calendar for no benefit at all. Run setup in parallel.
Related reading: how to start a vending machine business (every line above, explained), the pre-machine legal setup checklist, how long the launch actually takes, one machine, three, or a small route, the 100-door math, and the mistakes to avoid in your first 90 days.
What is selling, which buildings say yes, and the numbers before you buy a machine. Free, confirm from your inbox, unsubscribe in one click. Refer one friend and get 25 VendBuddy credits.
Every operator we talk to wants fewer cold calls. The ones who get there have a Google Business Profile and a simple site a manager can check before replying. AI builders make that an evening job now. Wix is the mature site builder; Base44 also builds working tools like a quote form. Start with the AI website walkthrough or Wix vs Base44.
General information, not legal, tax or financial advice. Rules change, so check the official source. Revenue and income figures are examples, not promises. See our terms.